Power surges are often underestimated, yet they pose significant risks to HVAC systems in residential and commercial properties. Understanding why these surges are dangerous can help homeowners and facility managers take necessary precautions to avoid costly repairs and unexpected breakdowns.
What Causes Power Surges?
Power surges occur when there is a sudden spike in electrical voltage. These spikes can be caused by a variety of factors, such as:
– Lightning Strikes: Even if lightning doesn’t hit your property directly, it can cause voltage surges through your electrical wiring.
– Utility Grid Switching: Fluctuations during power restoration or changes in the grid load can lead to brief but intense voltage spikes.
– Faulty Appliances: Malfunctioning appliances or large equipment being turned on or off can create localized surges that affect other devices on the circuit.
– Downed Power Lines: Storm damage or accidents involving power poles often cause unpredictable power fluctuations, impacting nearby systems.
Why Are HVAC Systems Particularly Vulnerable?
HVAC systems rely on a range of sensitive electronic components such as circuit boards, compressors, and thermostats. These components are engineered for efficiency and precision but are not designed to handle irregular voltage levels. A sudden surge of electricity can overwhelm these components, leading to short circuits, overheating, or complete failure.
Consequences of Power Surges on HVAC Systems:
- Damaged Compressors
The compressor is one of the most critical and expensive parts of an HVAC system. A power surge can destroy its internal wiring or motor. - Burned Circuit Boards
These essential boards manage communication between various system parts. Surges may cause irreversible damage requiring costly replacements. - Thermostat Malfunctions
Smart thermostats connected to your HVAC unit are particularly vulnerable due to their reliance on low-voltage control signals. - Reduced System Efficiency
Even if a surge doesn’t completely ruin any components, it can degrade their performance over time, leading to higher energy consumption and inconsistent heating or cooling.
Risk Assessment Table: Likelihood of Power Surge Impact
| Cause | Frequency | Severity for HVAC Systems |
| Lightning Strikes | Low | High |
| Utility Grid Switching | Moderate | Medium |
| Faulty Appliances | High | Medium |
| Downed Power Lines | Low | High |
Preventive Measures Against Power Surges
While it’s impossible to eliminate all risks associated with power surges, implementing preventive measures significantly reduces their impact: – Install an HVAC Surge Protector specifically designed for protecting sensitive equipment like air conditioners and furnaces. – Invest in full-house surge protection systems for broader coverage against electrical fluctuations. – Ensure regular maintenance of your HVAC system to identify potential vulnerabilities before they escalate. – Disconnect your system during severe storms when possible.
Recognizing the threat posed by power surges is the first step toward safeguarding your HVAC investment against premature failures and expensive repairs. Taking proactive steps ensures uninterrupted comfort while extending the lifespan of your heating and cooling system.
How an Orlando FL HVAC Company Explains HVAC Surge Protectors and Their Function
An HVAC surge protector is specifically designed to safeguard your heating, ventilation, and air conditioning (HVAC) system against unexpected electrical surges. These surges are unpredictable power spikes that can occur due to various reasons, such as lightning strikes, power outages, or issues with the electrical grid. While they may only last a fraction of a second, these spikes can deliver thousands of volts of electricity, far exceeding what most HVAC systems are built to handle.
The Role of an HVAC Surge Protector
- Voltage Monitoring: The surge protector continuously monitors the flow of electricity into your HVAC system.
- Diverting Excess Power: When it detects a voltage spike beyond a safe threshold, it redirects the excess energy away from sensitive components like compressors, circuit boards, and capacitors.
- Absorbing Surges: Some models include built-in mechanisms like metal oxide varistors (MOVs), which absorb excess energy until it dissipates safely.
Key Features to Look for in an HVAC Surge Protector
- Clamping Voltage: This determines the voltage level at which the device begins protecting your system. Lower clamping voltages provide better protection.
- Response Time: A fast response time ensures that surges are mitigated before they can cause harm.
- Joule Rating: This indicates how much energy the device can absorb before failing; higher ratings typically mean better durability.
- Indicator Lights or Alarms: These alert you when the surge protector is actively working or if it needs replacement.
| Feature | Importance |
| Clamping Voltage | Protects equipment at lower thresholds |
| Response Time | Ensures instant protection against sudden surges |
| Joule Rating | Determines energy absorption capacity |
| Indicator Lights | Provides real-time status updates |
Why Your HVAC System Needs Surge Protection
- Prevention of Costly Repairs: A single severe power surge could damage high-value components like compressors or control boards, resulting in repair bills ranging from hundreds to thousands of dollars.
- Extended Equipment Lifespan: Repeated smaller surges can gradually degrade internal parts over time. Protecting against them helps maintain performance and reliability.
- Peace of Mind During Storms or Grid Issues: Knowing your system is safeguarded minimizes stress during adverse weather or unexpected power fluctuations.
How Does It Differ From Standard Power Strips?
- An HVAC-specific surge protector connects directly to your unit’s electrical supply line for full-system coverage.
- It is engineered to handle higher voltages typical of large appliances.
Installing an HVAC surge protector should be viewed as more than just an optional upgrade; it’s a practical investment in long-term efficiency and security for one of the most crucial systems in any property.

Understanding AC Repair Orlando: HVAC Surge Protectors vs. Whole-House Surge Protection
Surge protection is a critical safeguard for electrical systems, but not all surge protection devices are created equal. Understanding the differences between HVAC surge protectors and whole-house surge protection systems can help homeowners and businesses make informed decisions about how best to protect valuable equipment, including HVAC systems.
What Is an HVAC Surge Protector?
An HVAC surge protector is a specialized device designed to shield heating, ventilation, and air conditioning (HVAC) units from power surges. These surges can originate from external sources like lightning strikes or internal factors such as sudden changes in electrical load within the property. By intercepting excessive voltage before it reaches the HVAC unit, these protectors prevent damage to sensitive components like circuit boards, compressors, and thermostats.
Key Features of an HVAC Surge Protector:
– Targeted Protection: Specifically safeguards HVAC components. – Compact Design: Typically installed directly on or near the outdoor condenser unit.
– Cost-Effective: A more affordable option for protecting only the HVAC system compared to whole-house solutions.
What Is Whole-House Surge Protection?
Whole-house surge protection provides comprehensive defense against power surges across an entire property. Installed at the main electrical panel, these devices protect every appliance and electronic device connected to the building’s electrical system.
Key Features of Whole-House Surge Protection:
– Broad Coverage: Shields all electrical circuits in a home or building.
– Higher Capacity: Designed to withstand larger surges caused by events such as lightning strikes or major grid disruptions.
– Layered Defense: Often used in conjunction with point-of-use surge protectors for enhanced safety.
Primary Differences Between HVAC Surge Protectors and Whole-House Systems
| Feature | HVAC Surge Protector | Whole-House Surge Protector |
| Scope of Protection | Limited to protecting only the HVAC unit. | Extends protection across all circuits in a property. |
| Installation Location | Near or on the outdoor condenser unit. | Installed at the main breaker panel. |
| Cost Range | $50–$200 (plus installation fees). | $300–$600 (plus installation fees). |
| Primary Purpose | Focused on safeguarding essential HVAC parts. | Provides general surge protection for all electronics. |
Factors to Consider When Choosing Between Them
- If your primary concern is protecting your expensive heating and cooling system, investing in an HVAC-specific surge protector may be sufficient.
- For broader peace of mind covering appliances like refrigerators, computers, televisions, etc., it may be worth spending more on whole-house protection.
- Smaller homes with minimal electronic equipment often benefit more from standalone solutions like an HVAC surge protector.
- Larger properties with numerous high-value electronics may require full-scale protection afforded by whole-house systems.
- Areas prone to frequent lightning storms or grid-related power issues benefit significantly from layered defense involving both a whole-house protector and individual device-level protectors like those for your HVAC system.
- Older homes with outdated wiring may need upgrades before installing advanced whole-home solutions.
Complementary Use of Both Systems
For optimal results, many experts recommend using both types of protections together: – Install a whole-house surge protector at your electrical panel as a first line of defense. – Add dedicated point-of-use devices like an HVAC surge protector for secondary coverage against voltage fluctuations targeting critical equipment directly.
By understanding these differences and evaluating your specific needs, you can create a robust strategy that ensures long-term safety for both your home’s electronics and its vital climate control systems.
Signs Your HVAC Service Orlando May Already Have Surge Damage
Power surges, whether caused by lightning strikes, electrical grid issues, or internal electrical malfunctions, can severely impact HVAC systems. Identifying early signs of surge damage is critical to preventing further complications and costly repairs. Below are key indicators that your HVAC system may have already sustained damage from a power surge.
1. Frequent Tripping of Circuit Breakers
One of the most common signs of surge damage is the repeated tripping of circuit breakers connected to your HVAC system. Surges can overload the circuit, leading to breaker trips as a safety mechanism. While this isn’t always indicative of permanent damage, recurring issues should not be ignored.
2. Unusual Noises Coming from the System
If your HVAC unit begins producing strange buzzing, humming, or clicking sounds that were not present before, it could signify electrical damage. Surge-related issues can affect internal components such as capacitors or the motor, resulting in these abnormal noises.
3. Short Cycling or System Inefficiency
A damaged HVAC system might start cycling on and off more frequently than usual (a phenomenon known as short cycling). Surge damage can impair critical components like thermostats or compressors, reducing efficiency and causing erratic behavior.
4. Failure of Specific Components
- Capacitors: These devices store electrical energy and are often damaged by voltage spikes.
- Compressors: As one of the most expensive components in an HVAC system, compressors may fail after a severe surge.
- Circuit Boards: The control board is another susceptible component; if this is damaged, your entire system may stop functioning properly.
Component-specific failures often require diagnostic testing by a licensed contractor for accurate identification.
| Component | Common Symptoms of Surge Damage | Potential Cost Range for Replacement |
| Capacitor | Buzzing sounds, difficulty starting | $150 – $300 |
| Compressor | No cooling/heating output | $1,200 – $3,000 |
| Circuit Board | Unresponsive thermostat/system | $600 – $1,000 |
5. Unexpected Increase in Energy Bills
Surge-damaged systems may work harder than necessary to maintain desired temperatures due to impaired efficiency. If you notice an unexplained spike in energy bills despite consistent usage patterns, it could be linked to internal surge-related wear and tear.
6. Complete System Failure
In extreme cases where a significant power surge has occurred (e.g., during a lightning storm), the entire HVAC unit may cease functioning altogether. This usually requires extensive repair or even replacement depending on the extent of the damage.
What To Do If You Suspect Surge Damage
If you observe any signs listed above: – Turn off your HVAC system and avoid attempting DIY repairs. – Contact a licensed technician for an inspection and diagnosis. – Consider installing an HVAC-specific surge protector if one isn’t already in place to minimize future risks.
Monitoring for these warning signs is essential for maintaining both comfort and cost-effectiveness within your home or business environment while extending the life span of your heating and cooling equipment.
How Much Does It Cost to Replace HVAC Components Damaged by Surges?
Power surges can cause significant damage to HVAC systems, leading to costly repairs or replacements. Understanding the potential financial impact of surge-related damage can help homeowners and businesses appreciate the importance of preventative measures, such as surge protectors.
Costs Associated with Surge Damage
| Component | Cost Range (Parts Only) | Labor Costs | Total Estimated Cost |
| Thermostat | $100 – $300 | $75 – $150 | $175 – $450 |
| Compressor | $1,200 – $2,500 | $500 – $1,000 | $1,700 – $3,500 |
| Capacitor | $100 – $250 | $150 – $300 | $250 – $550 |
| Circuit Board | $150 – $600 | $200 – $500 | $350 – $1,100 |
| Fan Motor | $400 – $1,200 | $200 – $400 | $600 – $1,600 |
Note: Prices may vary based on region, brand quality, and the complexity of the replacement process.
Hidden Costs to Consider
- Energy Efficiency Loss: A damaged HVAC system may operate less efficiently until repairs are made.
- Downtime: If your system fails completely during extreme weather conditions (summer or winter), temporary alternative heating or cooling solutions may be necessary.
- Inspection Fees: Some contractors charge between $75-$150 for diagnostic services before repairs begin.
Preventing Surge Damage is More Cost-Effective
The cost of repairing or replacing damaged components often far outweighs the investment in preventative solutions like installing an HVAC surge protector. A high-quality surge protector typically costs between $100-$300, with installation fees ranging from $150-$400, depending on your location and contractor rates. This relatively small upfront cost can save thousands of dollars in future repairs.
Factors That Influence Replacement Costs
- Age of Equipment: Older systems may incur higher costs since replacement parts could be harder to find.
- Type of Surge Event: Severe electrical surges caused by lightning strikes might result in more widespread damage compared to minor power fluctuations.
- Warranty Coverage: If your system is under warranty, some repair or replacement costs might be covered by the manufacturer.
- Local Labor Rates: Labor expenses differ geographically; urban areas often have higher rates than rural locations.
Understanding these financial implications emphasizes why it’s prudent to safeguard your HVAC system against unpredictable power surges while avoiding unnecessary expenses in the long term.
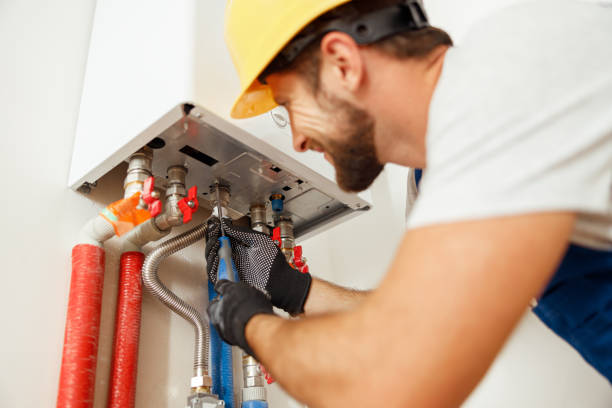
Step-by-Step Guide to Installation: Is Installing an HVAC Surge Protector Complicated?
Installing an HVAC surge protector may seem like a daunting task at first, but with the right tools, knowledge, and preparation, it can be a straightforward process. Below is a step-by-step guide that outlines how to approach the installation of this essential device.
Preparation Before Installation
- Gather Required Tools and Materials
You’ll need: - A compatible HVAC surge protector
- Screwdrivers (flathead and Phillips)
- Wire strippers/cutters
- Electrical tape
- Voltage tester or multimeter
- Safety gloves and goggles
- Turn Off Power Supply
Always turn off power to your home’s electrical panel and HVAC system before beginning any work. Use a voltage tester to ensure there’s no active current running through the circuits. - Understand Your Electrical Panel
Familiarize yourself with your electrical panel where the surge protector will be installed. Most HVAC surge protectors are installed at or near the disconnect box or breaker panel associated with your system.
Step-by-Step Installation Process
- Locate Mounting Spot
Identify where the surge protector will be installed. Check your HVAC system’s user manual for recommended locations, as it is often connected directly to the outdoor unit’s disconnect box or near the circuit breaker for maximum effectiveness. - Prepare Wiring Connections
Remove any protective cover from both the surge protector and disconnect box, exposing wire terminals for connection. - Wire the Surge Protector
Most HVAC surge protectors come with three wires—neutral (white), ground (green), and hot (black). Connect these wires accordingly:
| Wire Color | Connection Point |
| White | Neutral bar inside disconnect |
| Green | Ground terminal |
| Black | Hot wire/Live terminal |
Secure Connections
Once all wires are properly connected, secure them tightly using screws or clamps provided in your surge protector kit.- Reinstall Covers
Put back all covers on both the disconnect box and the surge protector housing to ensure safety during operation. - Test Functionality
Turn on power at your electrical panel and test whether your HVAC system operates normally with no interruptions or errors reported by connected devices like thermostats.
Common Challenges During Installation
- Compatibility Issues: Ensure that you’ve purchased a surge protector compatible with your specific HVAC system model.
- Improper Wiring: If wires are not securely connected or incorrectly matched, it can lead to malfunction.
- Lack of Electrical Knowledge: If you lack familiarity with electrical systems, hiring a licensed electrician is advisable instead of attempting DIY installation.
Should You Hire an Electrician?
Though installing an HVAC surge protector isn’t overly complicated for someone familiar with basic electrical systems, it can still pose risks if done improperly. Homeowners without prior experience should consider hiring a licensed technician who can ensure proper installation while adhering to local safety codes.
By following these steps carefully or seeking professional assistance from Orlando HVAC when needed, you can protect your expensive HVAC equipment from damaging power surges effectively while maintaining peace of mind about its performance reliability over time.
Who Benefits the Most from Installing a Dedicated HVAC Surge Protector?
Installing a dedicated HVAC surge protector is an investment that provides valuable protection for your heating, ventilation, and air conditioning system. While nearly any homeowner or business owner with an HVAC system can benefit from this device, certain groups may see even greater advantages. Let’s explore who benefits the most from installing a dedicated HVAC surge protector.
Homeowners in Areas Prone to Storms or Power Surges
- Frequent Lightning Strikes: If you live in a region prone to thunderstorms or frequent lightning activity, your electrical grid is more susceptible to sudden voltage spikes. These power surges can wreak havoc on your HVAC system’s delicate components.
- Unstable Power Grids: Rural areas or older neighborhoods often experience fluctuations in power delivery due to outdated infrastructure. Surge protectors help reduce the risk of these variations damaging your equipment.
Property Owners with High-End or Advanced HVAC Systems
Modern HVAC systems often include sensitive electronic components such as smart thermostats, energy-efficient compressors, and other advanced technologies. These systems are much more vulnerable to power surges compared to older models: – Smart Homes: If your home relies on IoT (Internet of Things) devices connected to the HVAC system, an unprotected surge could not only damage the unit but also disrupt overall home automation. – Expensive Repairs: Replacing high-end components can be costly. Investing in a surge protector minimizes these risks by shielding the electronics from sudden voltage increases.
Business Owners and Commercial Properties
For businesses and commercial properties that rely on climate control for operations, protecting their HVAC systems is critical: – Data Centers and Server Rooms: Businesses running data centers require stable temperatures to avoid overheating equipment. A single surge could cripple both their server room’s cooling system and their operations. – Retail Stores and Restaurants: For establishments where customer comfort is essential, ensuring uninterrupted operation of the HVAC unit can prevent loss of revenue due to downtime caused by equipment failure.
Landlords Managing Rental Properties
Landlords with multiple rental properties should consider installing dedicated surge protectors for their tenants’ comfort as well as for cost-saving purposes: – Reduced Maintenance Costs: Protecting the unit prevents costly repairs associated with power surges, reducing maintenance expenses over time. – Tenant Satisfaction: Tenants expect reliable heating and cooling systems. A failure due to surge damage could lead to tenant dissatisfaction or even legal disputes if repairs are delayed.
Homeowners with Expensive Electronics
HVAC systems are interconnected with other household electronics through shared circuits. For homeowners who have invested heavily in home theaters, computer setups, or kitchen appliances: – A surge affecting the HVAC circuit could potentially cascade into other parts of your home’s electrical system.
| Group | Key Benefits of Surge Protection |
| Storm-Prone Areas | Protects against frequent weather-related power surges |
| Smart Home Owners | Shields advanced electronic components like smart thermostats |
| Business Owners | Prevents downtime; ensures consistent climate control |
| Landlords | Reduces maintenance costs; improves tenant satisfaction |
| Tech-Savvy Homes | Safeguards interconnected electronics beyond just the HVAC system |
Installing an HVAC surge protector is not just about safeguarding one appliance—it’s about long-term financial savings and maintaining comfort for all those who rely on reliable climate control solutions. By identifying if you fall within these categories, you can decide whether investing in this technology aligns with your needs.
- Understanding Why Power Surges Are a Real Threat to Orlando HVAC Systems
- Complete Orlando HVAC Guide: Step-by-Step AC Installation Tips
- Expert Orlando HVAC and Plumbing Services for Your Home
- The Importance of Timely AC Repair Orlando Services for Home Comfort
- Trusted Orlando HVAC Services for Reliable Installation and Year-Round Comfort
- Expert AC Repair Orlando Services from a Professional HVAC Contractor
- Expert Tips for AC Repair Orlando and Professional HVAC Replacement
- A Comprehensive Guide to Finding Trustworthy Orlando HVAC Contractors for Your Home
- Important Questions to Ask Before Hiring an AC Repair Orlando Specialist for Your Home